Everything a
responder needs.
One pocket app.
The Responder App is what every deployed person — patroller, guard, medic, or volunteer — carries in their pocket. It receives assignments, routes them to the scene, logs their work, and keeps them connected to the control room and each other.
Home & My Alarms
The responder's own panic button, status broadcasts, and a running feed of what needs their attention.
The home screen is the responder's dashboard — every core function launches from one grid of tiles, with duty status and shift controls anchored below it.
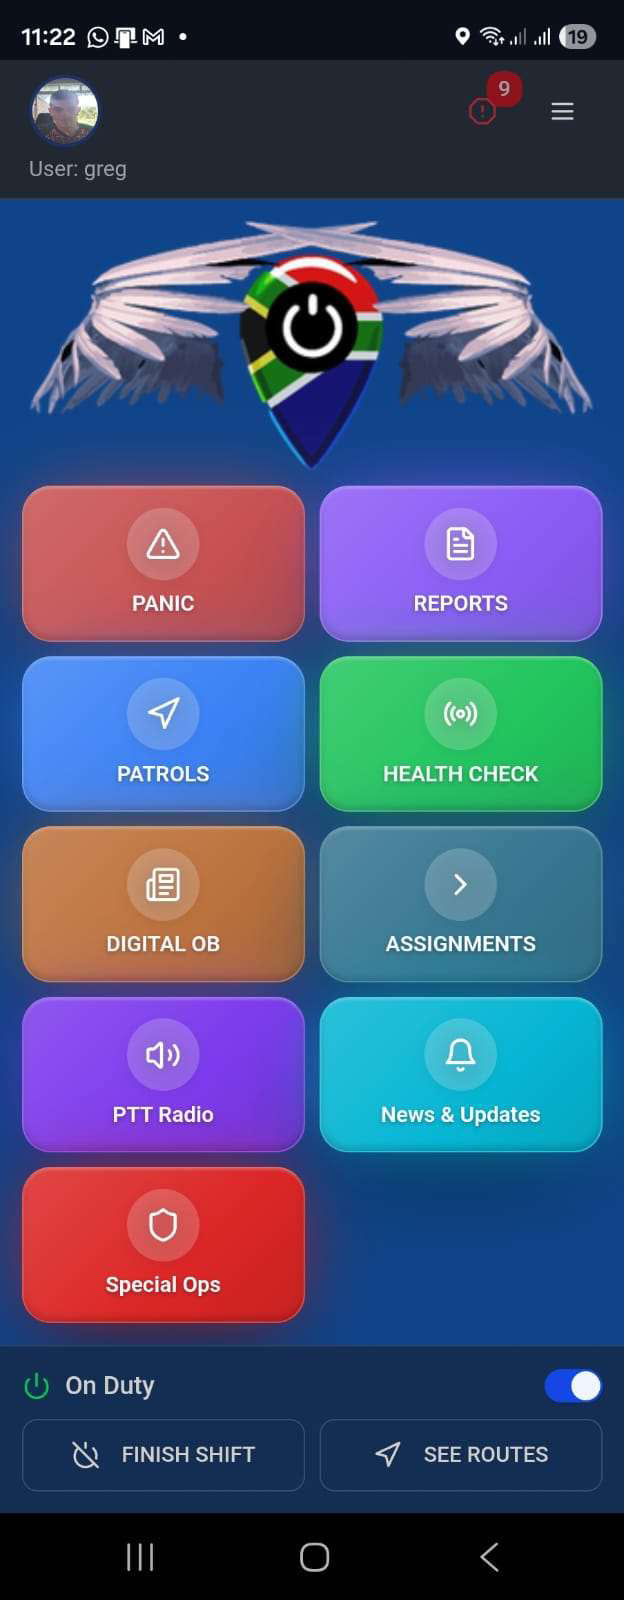
On Duty is the master switch. The toggle at the bottom of the dashboard marks a responder active and reachable for assignments. Finish Shift takes them off duty; See Routes jumps straight to assigned patrol routes without opening the Patrols tile first.
Reports & Digital OB
Two ways to put something on record — a categorized incident report with a location, or a structured occurrence-book entry.
Not everything a responder encounters is an emergency. Reports and the Digital Occurrence Book give them a fast, structured way to document what they see without needing to dispatch anyone.
Filing a Report
Reports are pre-categorized by type — Guns, and other incident categories a community defines — so the responder only has to describe, place, and attach evidence for whatever they're logging.
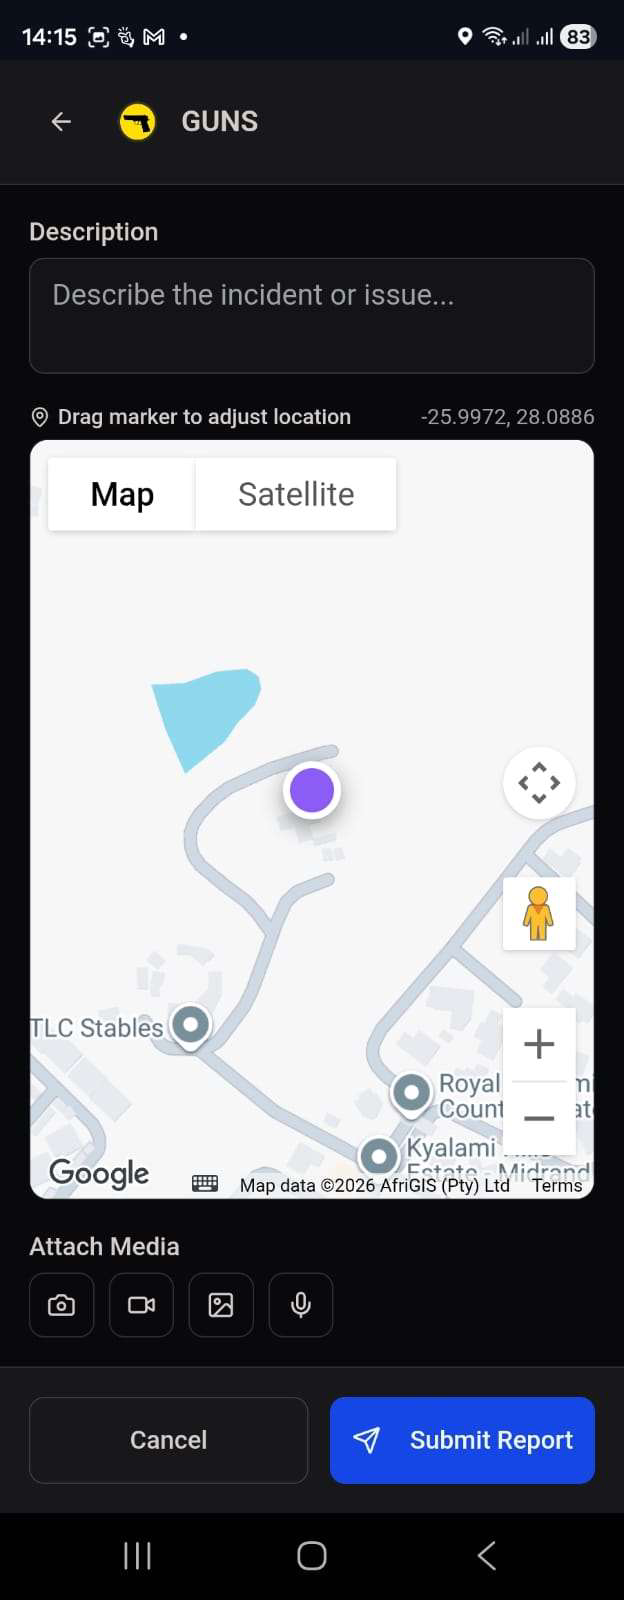
- The category icon (here, Guns) sets context immediately for whoever reviews it later.
- Location defaults to the responder's GPS position but can be dragged to the exact spot on the map.
- Photos, video, gallery uploads, and voice notes can all be attached before submitting.
Digital OB — structured occurrence logging
The Digital OB replaces a paper occurrence book with the same discipline: every entry is classified, described, located, and — critically — records what action was actually taken.
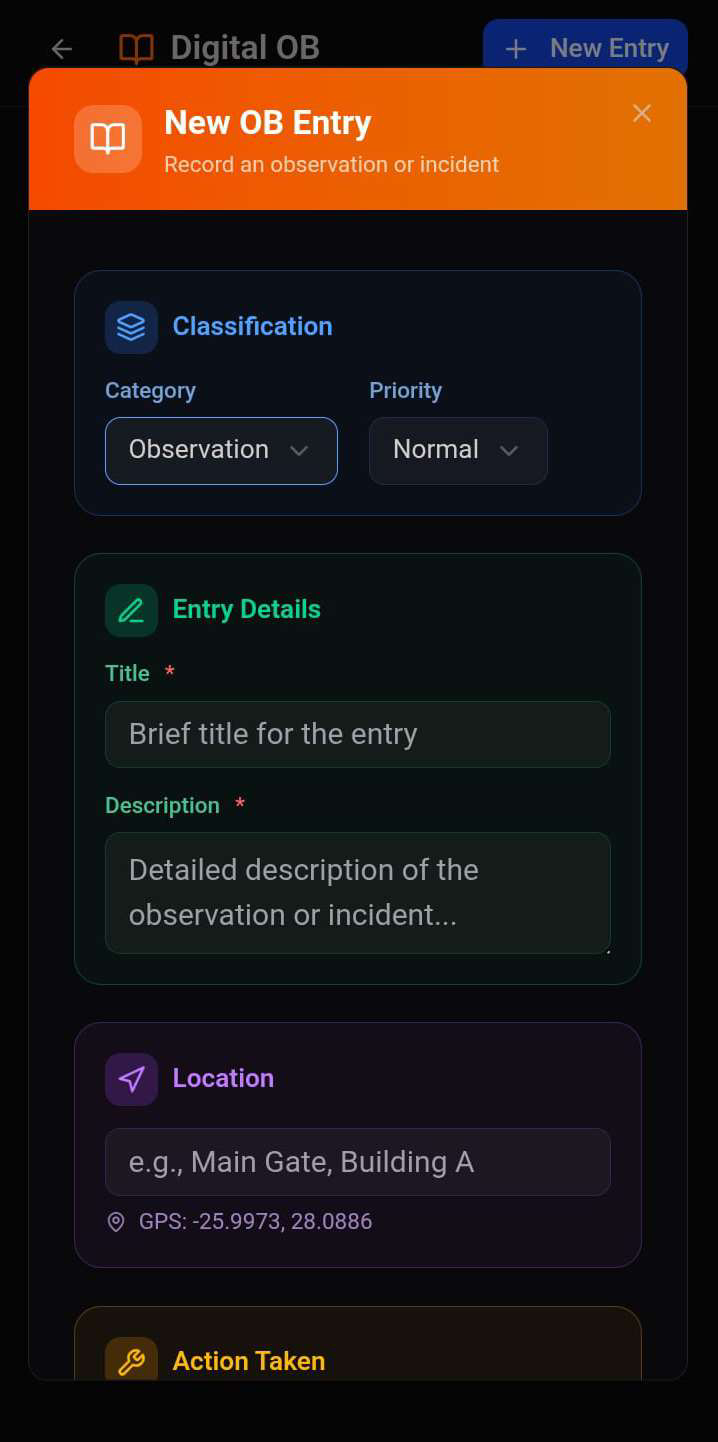
Action Taken is the field that matters most. An OB Entry isn't just a record of what happened — it documents what the responder did about it, and a Follow-up Required toggle flags anything that needs a second look from a supervisor.
Patrols
Route-based patrols with automatic checkpoint logging — no manual sign-off needed at each stop.
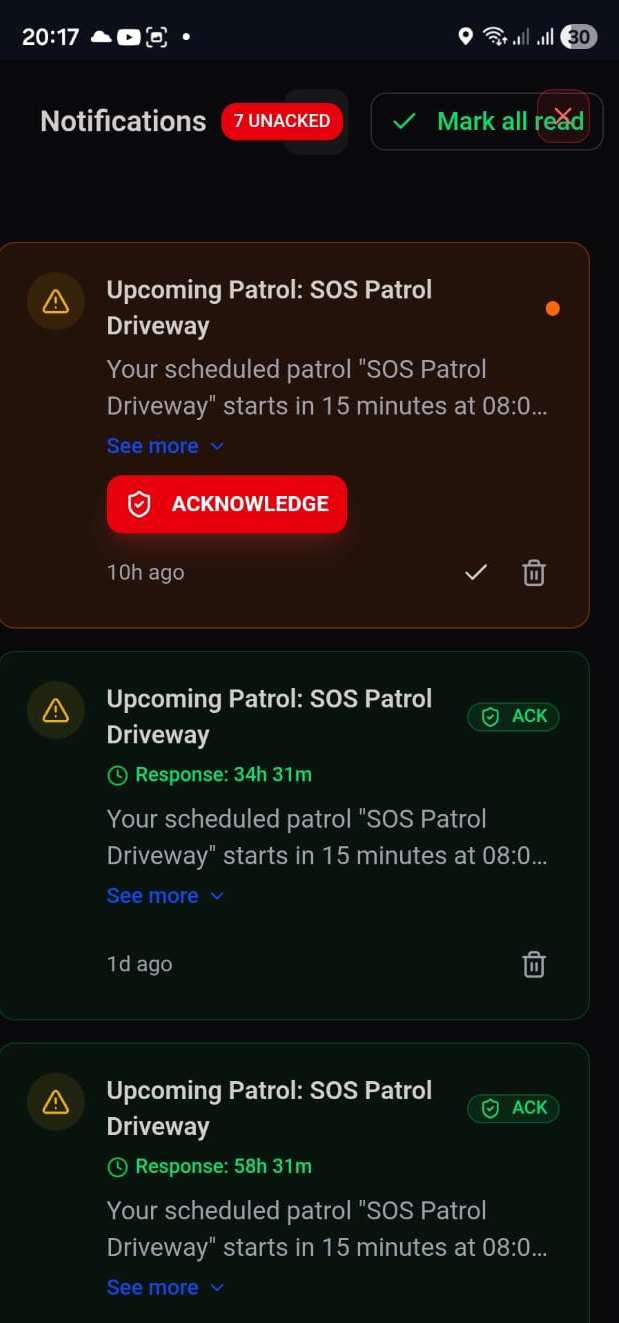
Scheduled patrols (like the "SOS Patrol Driveway" route seen in Notifications) are started from within the app, with the route and its checkpoints already mapped out.
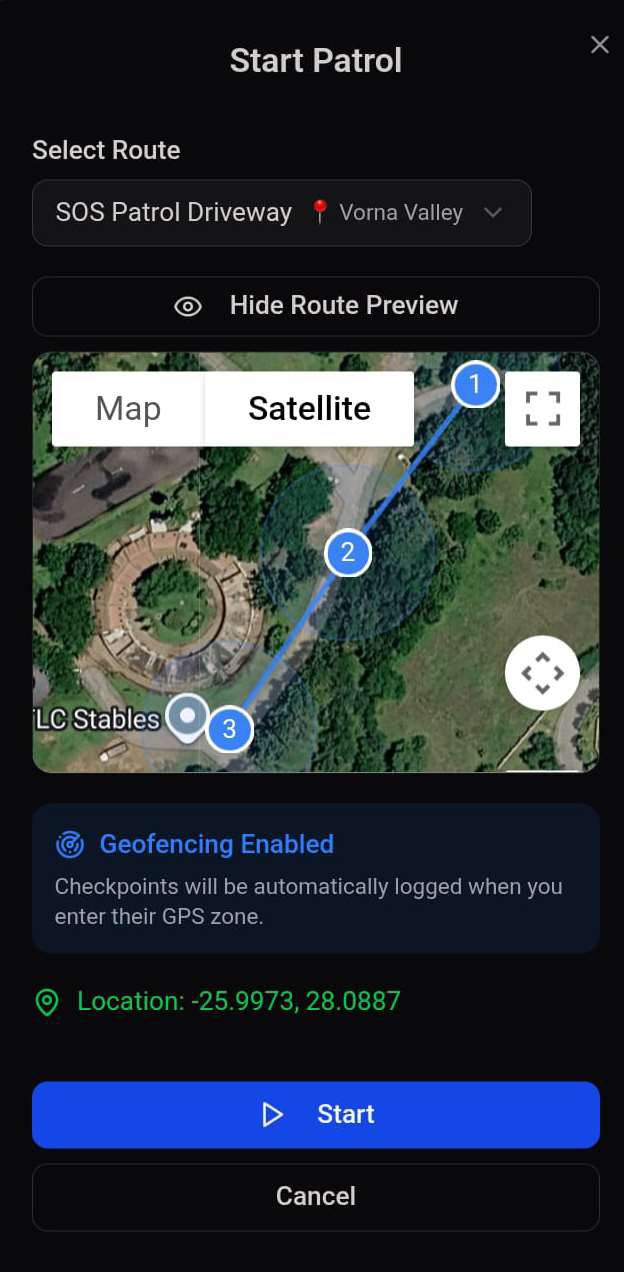
Passive verification beats manual sign-off. Geofenced checkpoints remove the temptation (and the memory burden) of manually logging a stop — the patrol record is built from where the responder's phone actually was.
Assignments & Dispatch
From an unmissable full-screen alert to a completed event — the responder's core dispatch loop.
This is the same dispatch flow covered from the Operator's side in the Event Processing Admin Guide. Here's what it looks like landing on the responder's phone.
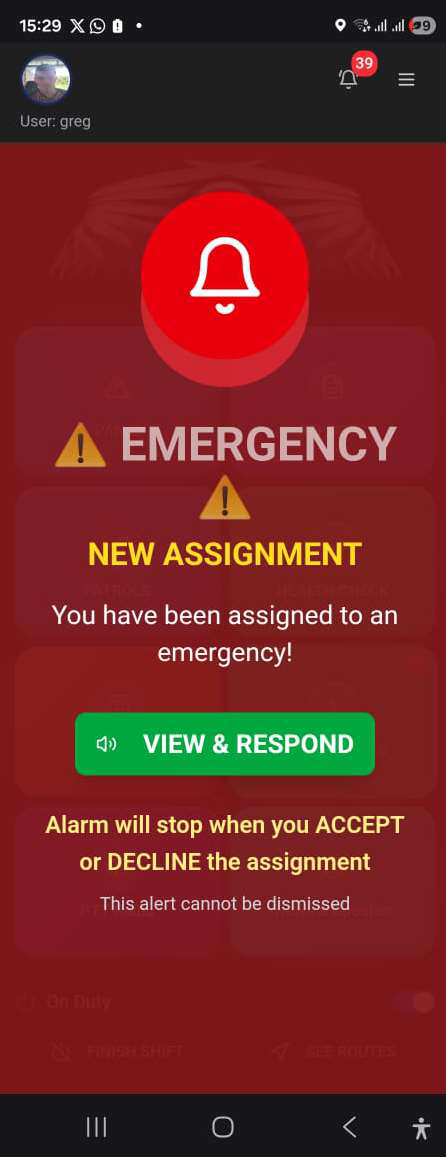
New Assignment alert
A full-screen, sound-on emergency alert that cannot be dismissed — only Accept or Decline stops the alarm.
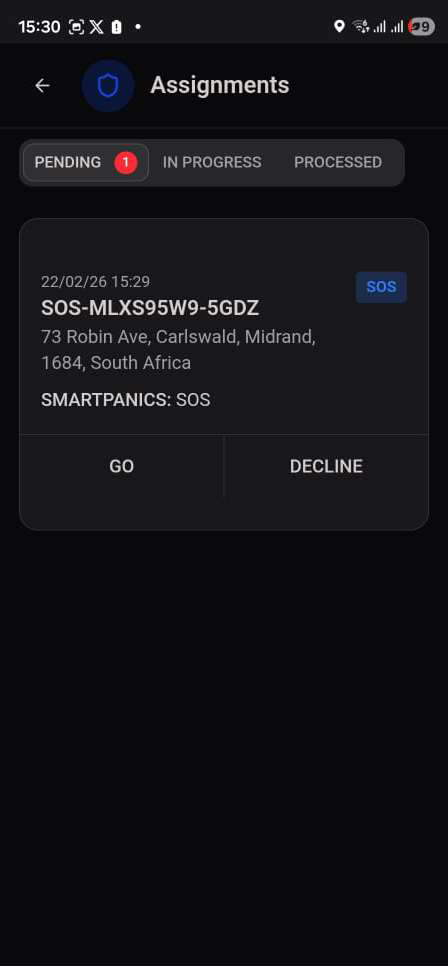
Pending assignments list
Accepted or newly arrived assignments sit in a Pending queue with account ID, location, and incident type, ready to Go or Decline.
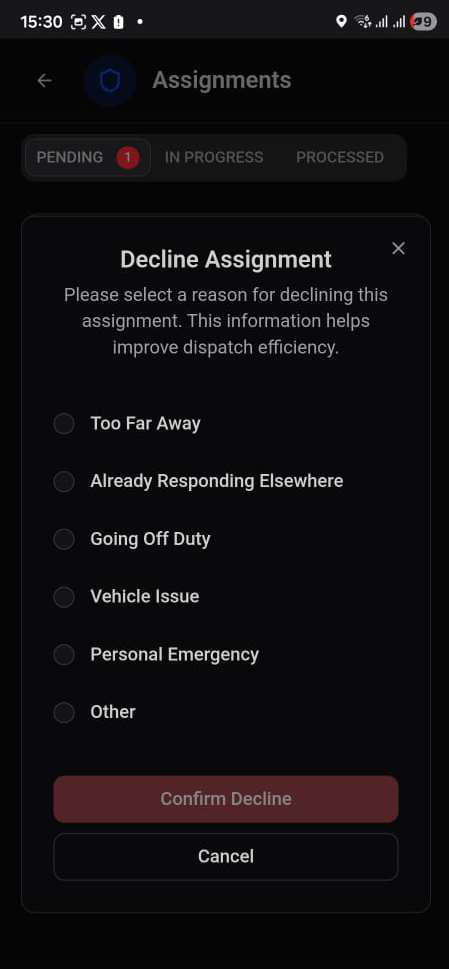
Decline with a reason
Declining requires a reason — too far away, already responding elsewhere, off duty, vehicle issue, personal emergency, or other — so dispatch efficiency data stays accurate.
En route to arrival
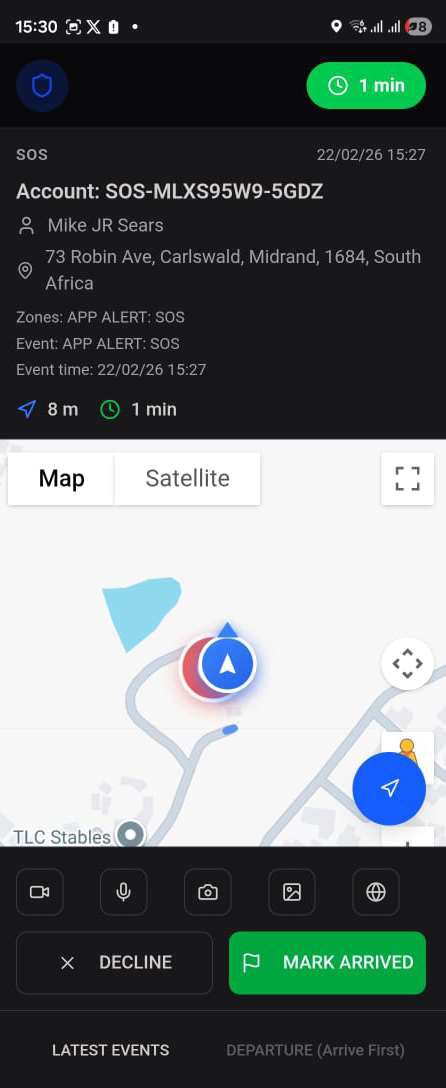
Once accepted, the live map tracks distance and ETA to the scene, with Mark Arrived confirming the responder is on-site.
Event Verification
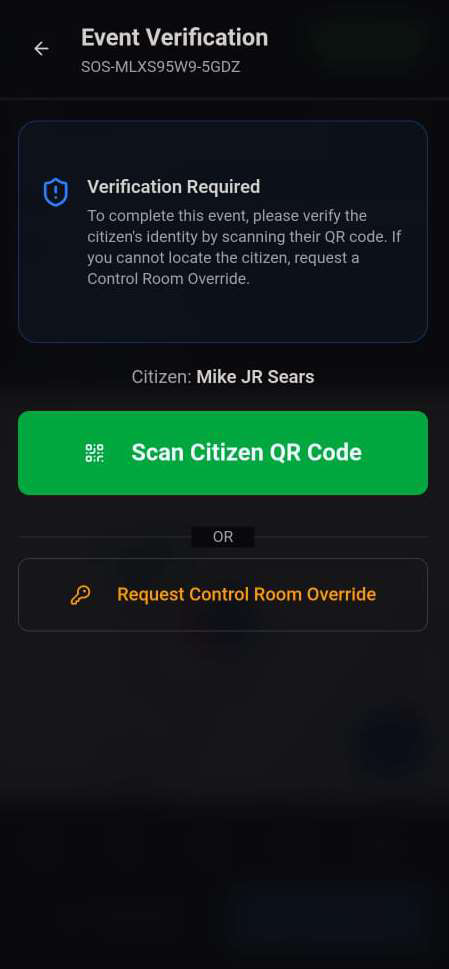
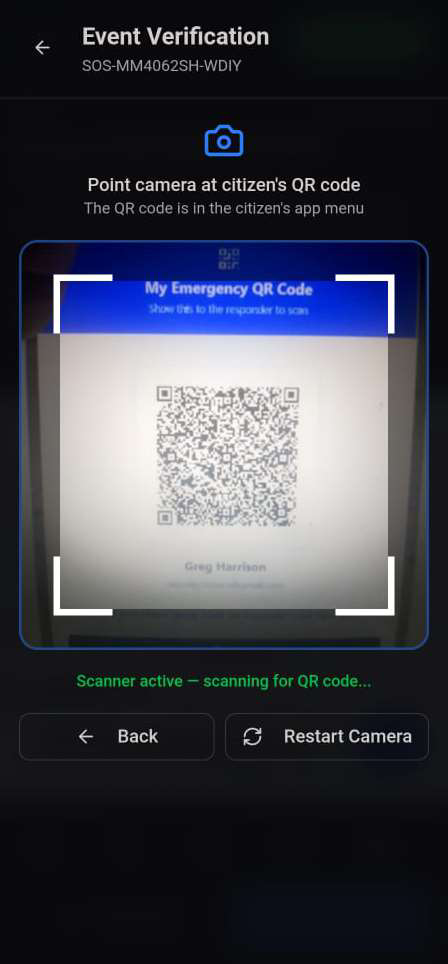
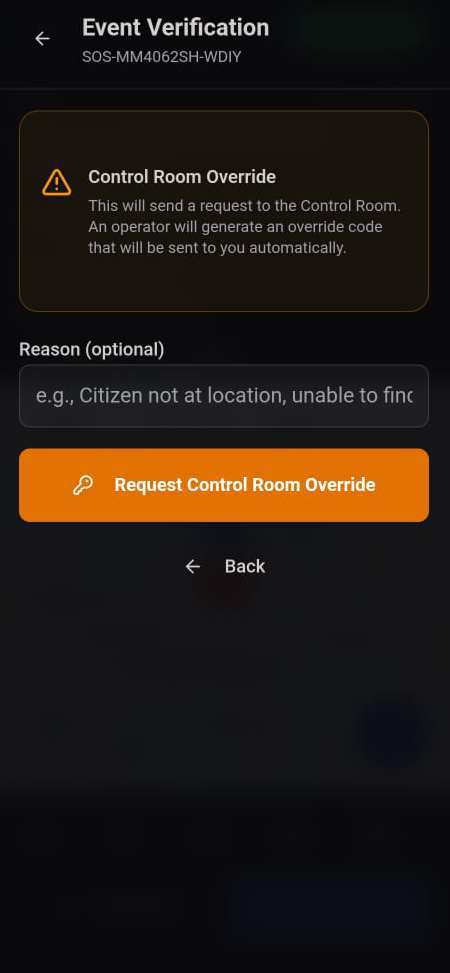
A QR scan proves the responder reached the right person — a control room override covers the moments it can't happen.
Arrival at a pin isn't the same as arrival at the person. Event Verification closes that gap before an event can be marked complete.
Completing the event
Once the scan succeeds — or the control room approves an override — the on-scene screen swaps Mark Arrived for Complete, closing out the assignment.
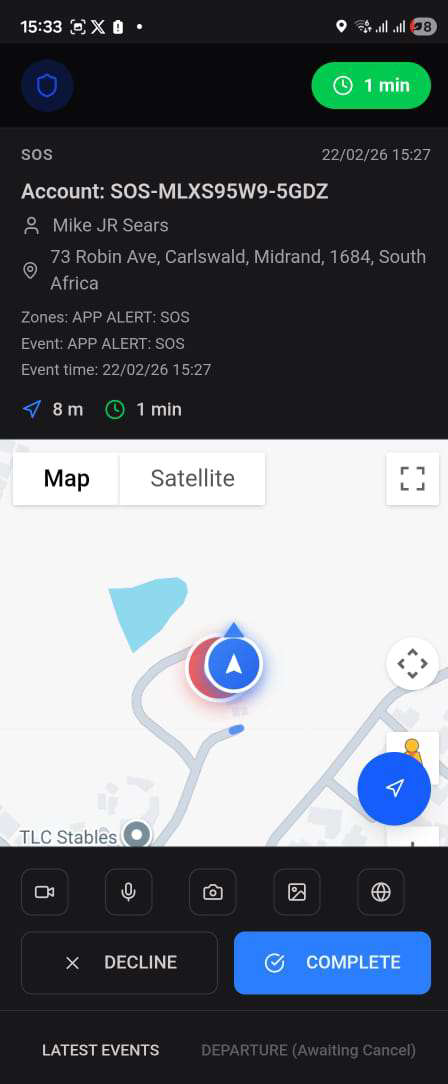
Why this step isn't optional. Skipping straight to "complete" would let a responder close an event without ever confirming they found the person who needed help. The scan — or an accountable override — is the one point that proves it happened.
PTT Radio & News
Push-to-talk channels for real-time coordination, and a News feed for everything that isn't an assignment.
Assignments cover emergencies; PTT Radio and News & Updates cover everything else a responder needs to stay coordinated with their team and the control room.
PTT Radio
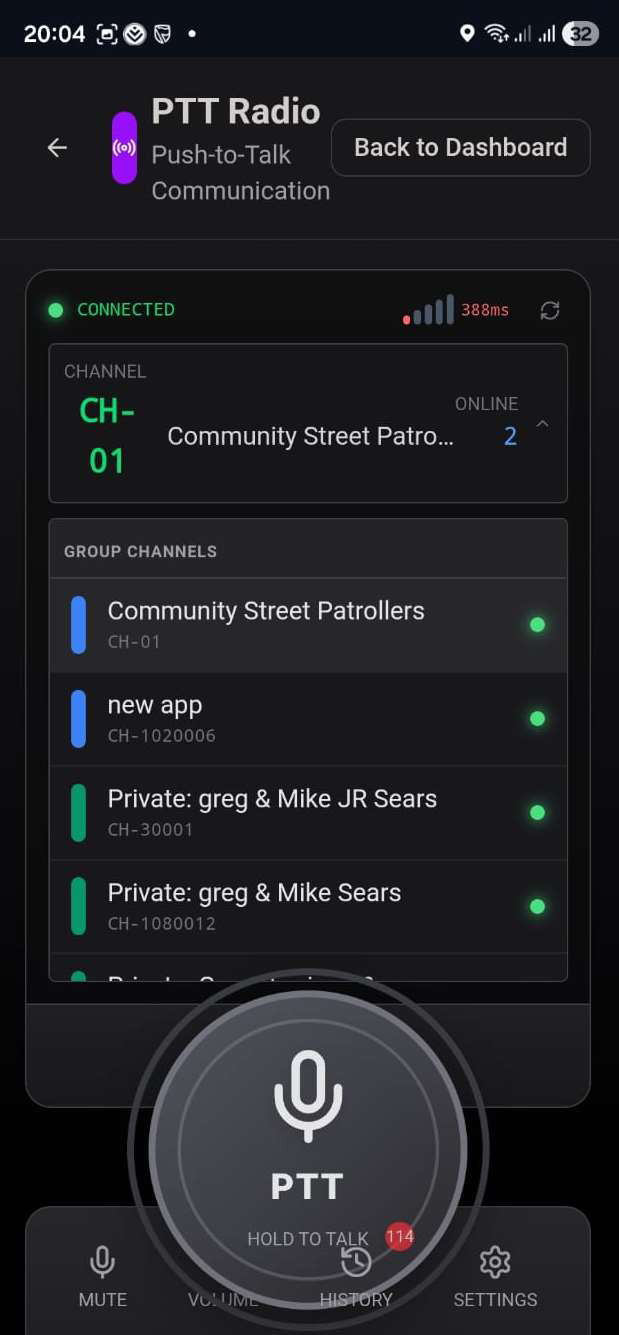
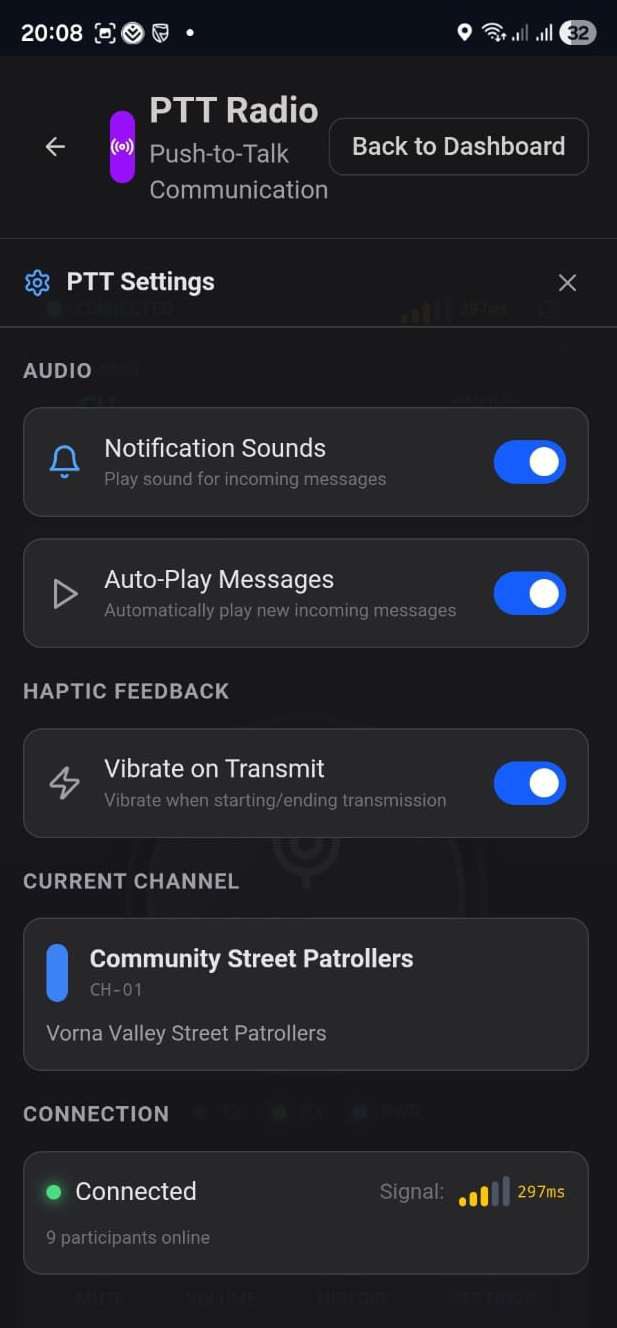
Group and private channels behave like a walkie-talkie — hold to talk, releases to send, with a message history any team member can replay.
News & Updates
Alerts, assignment notices, and bulletins from the control room and community leadership all land in one feed, filterable by type.
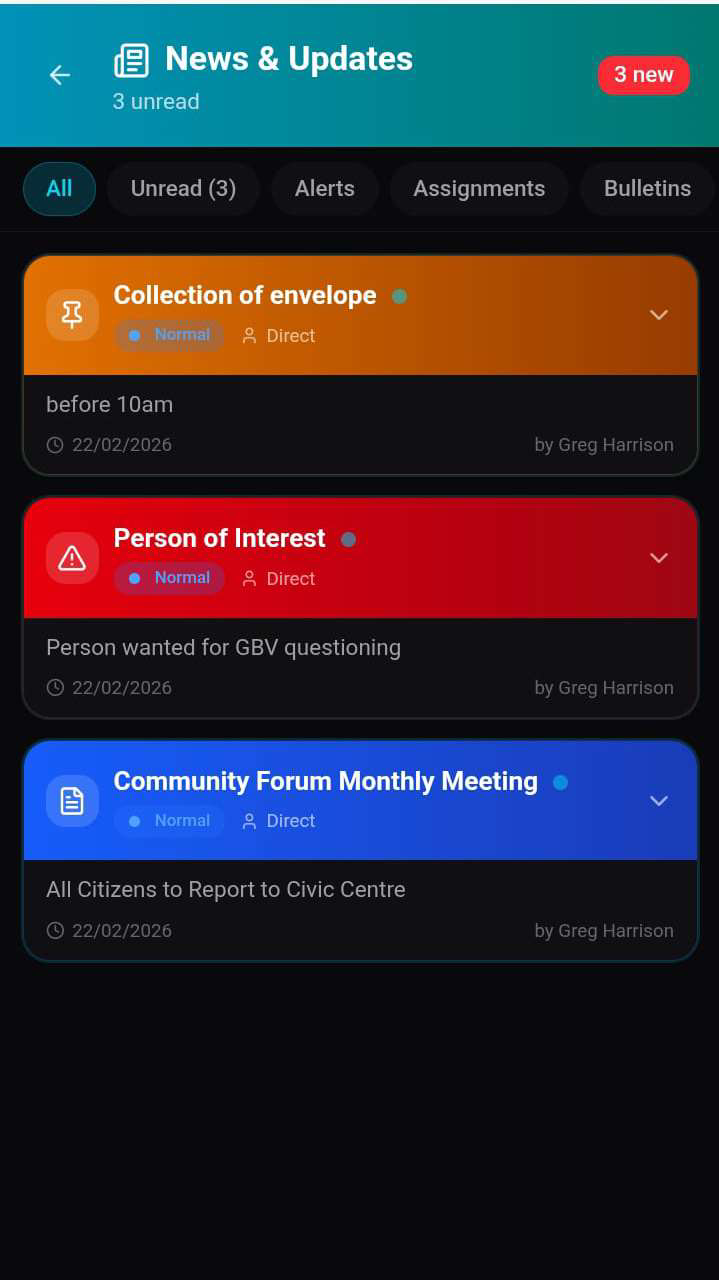
Alerts responders actually need to see. A "Person of Interest" bulletin puts a name and context in front of every responder on shift — the same instant, without waiting on a radio call to reach them.
Profile & History
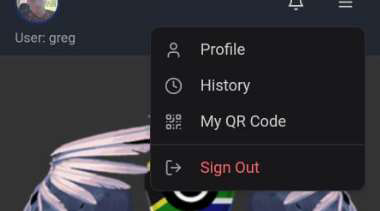
Identity, credentials, and a full record of past responses — accessible from one menu.
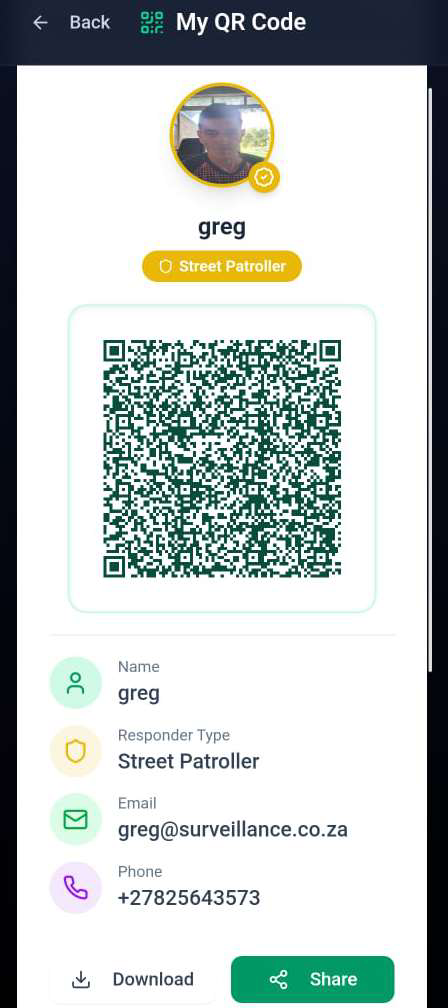
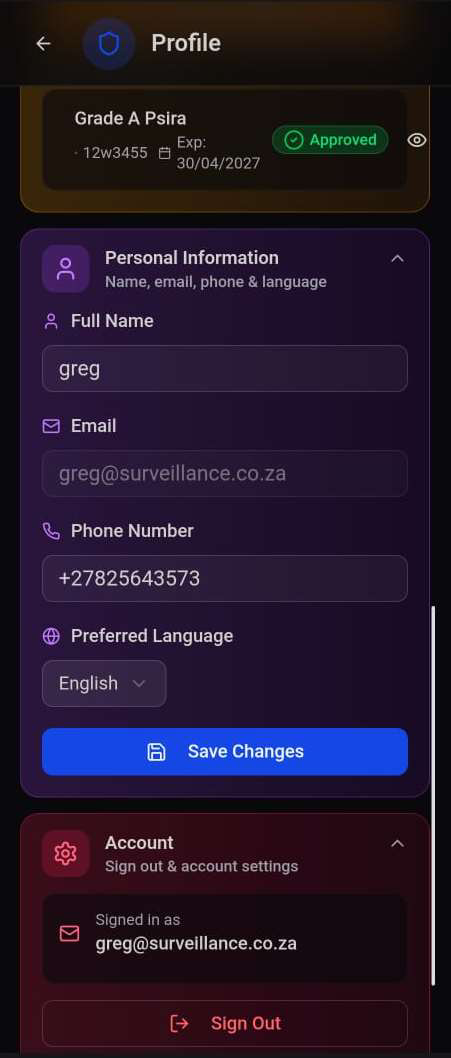
Every responder carries a verified identity in the app — the same QR code a citizen scans them by, backed by a credential record and a searchable response history.
Response History
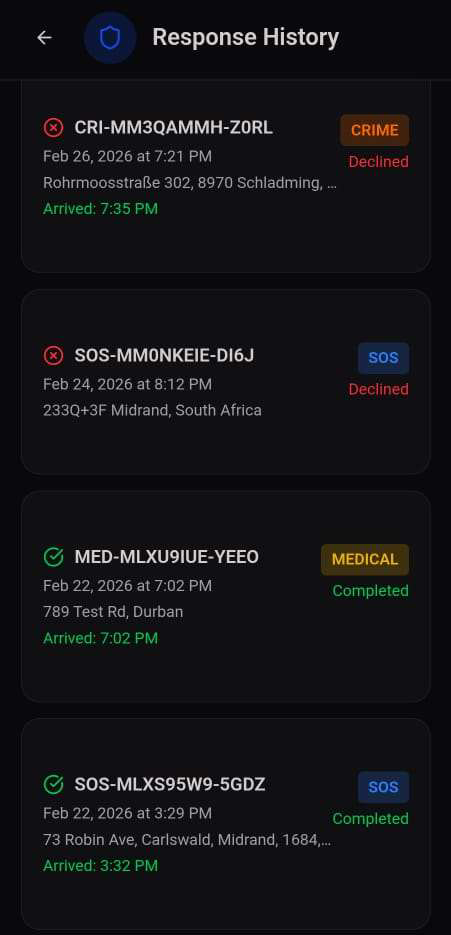
Every past assignment — completed or declined — is kept on record with its category, timestamp, address, and outcome.
Credentials tie identity to accountability. A responder's profile carries their verified credential (grade, expiry, approval status) alongside their history — so both who they are and what they've done are always one tap away.
Everything a responder needs, in one app
From personal safety tools to dispatch, documentation, verification, and team communication, the Responder App is the field-side counterpart to the Operator console. See the Event Processing and Responder Management Admin Guides for how these same events look from the control room.
Special Ops
A separate, mission-based workflow for tasked deployments — briefings, live tactical tracking, and structured reporting.
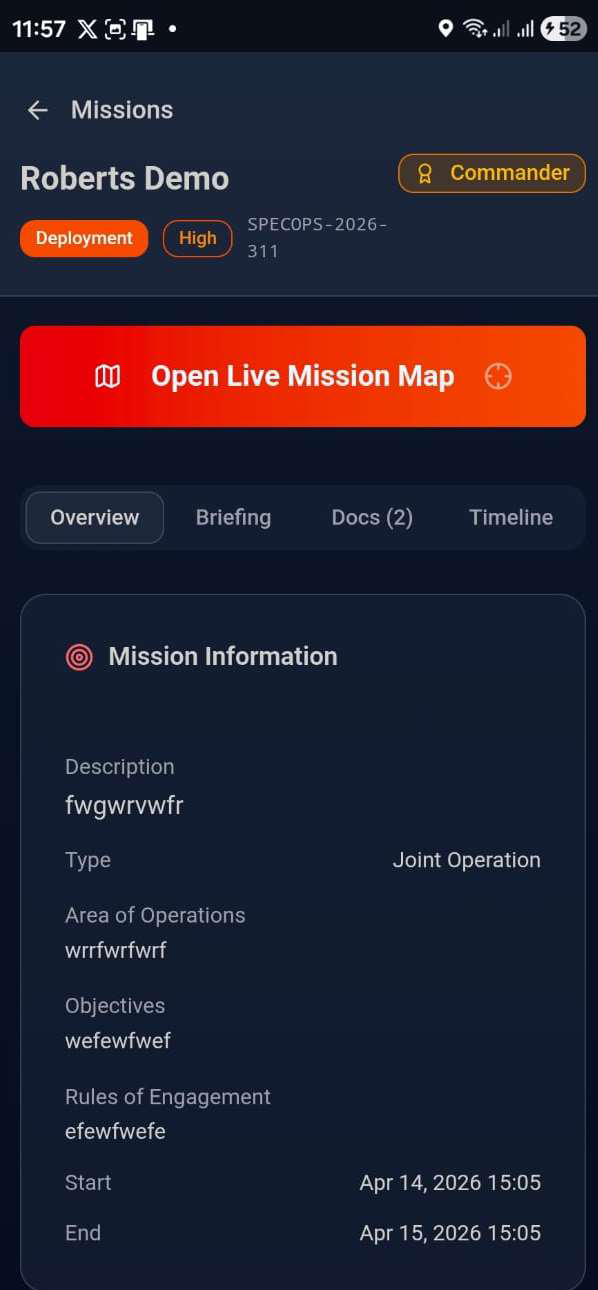
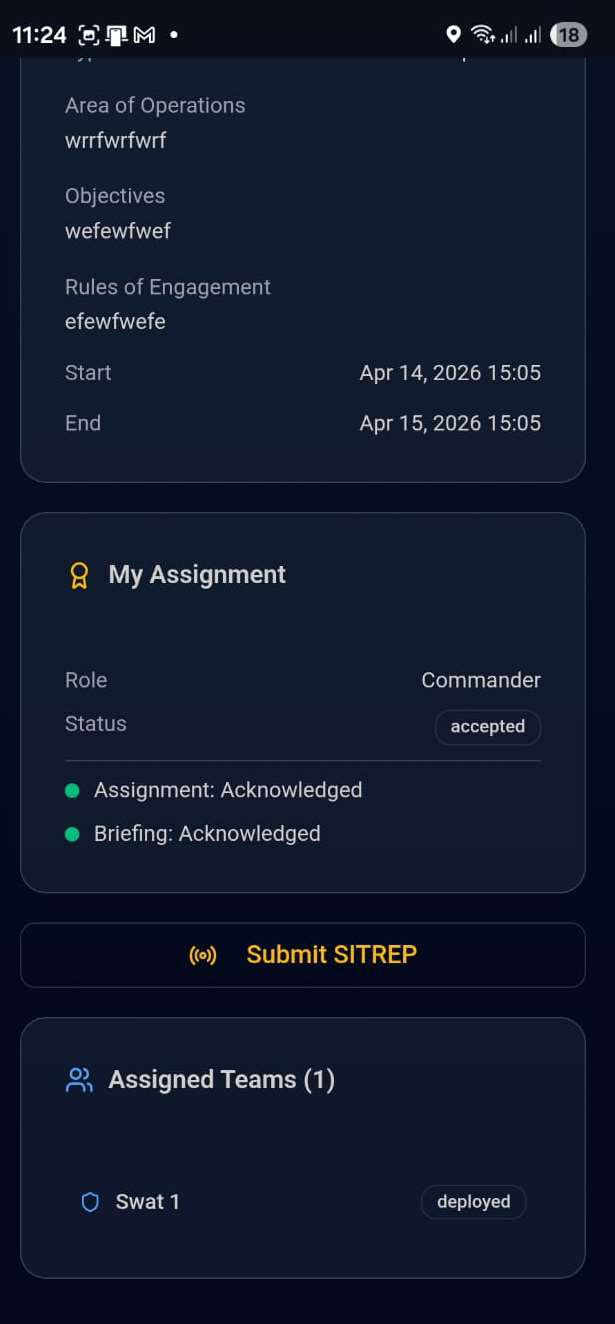
Special Ops missions are distinct from everyday assignments: they're planned deployments with a defined role, briefing, and rules of engagement, tracked from tasking through to live execution on a tactical map.
Missions
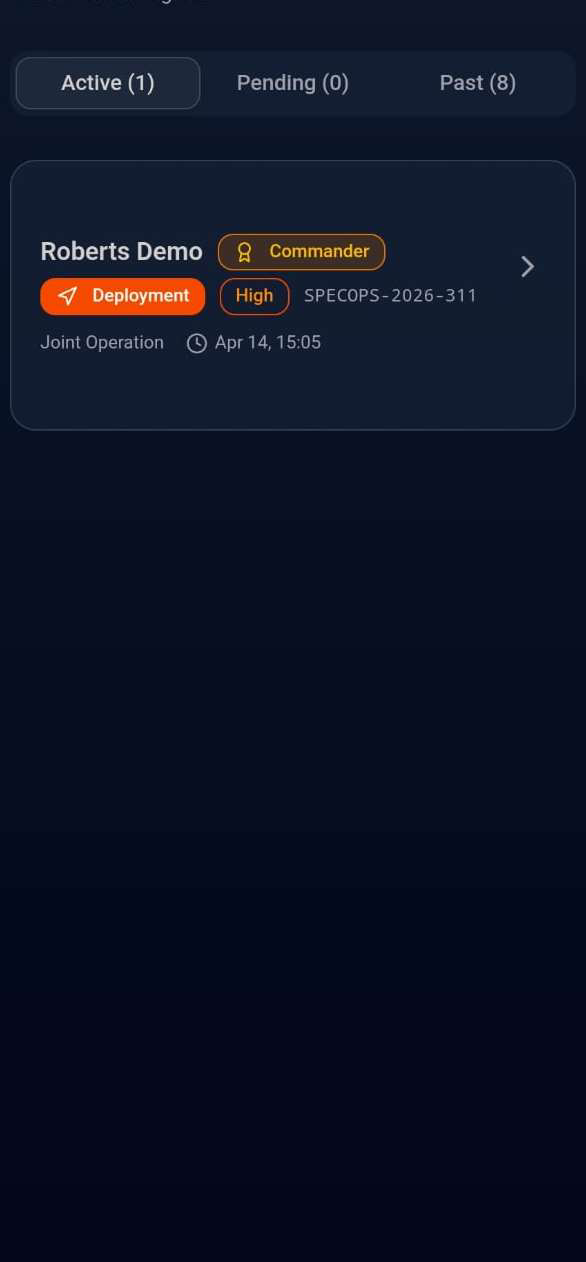
Every tasked deployment appears on the Missions list, split into Active, Pending, and Past, tagged with a mission code, priority, and the responder's role on it.
Live Mission Map
Opening the live map drops the responder into a tactical view built for a deployment, not a single incident: Blue Force positions, and a radial action menu in place of ordinary map controls.
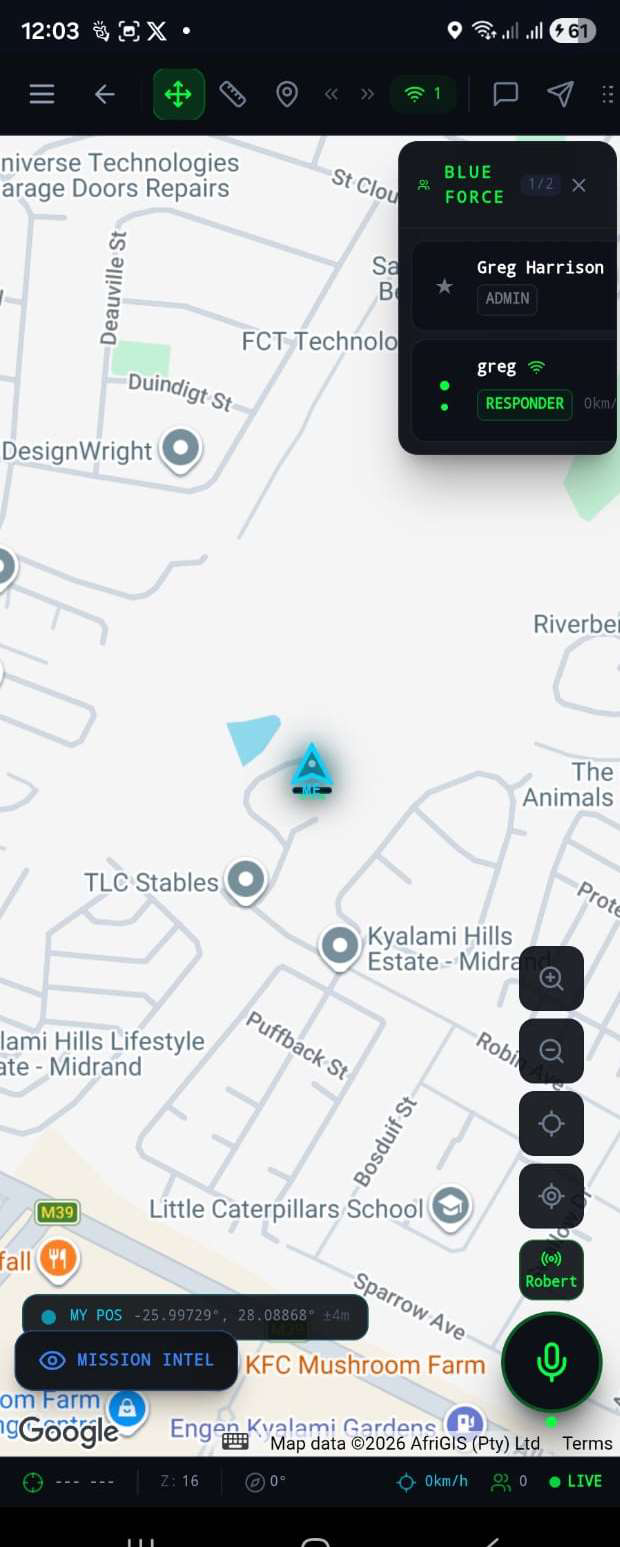
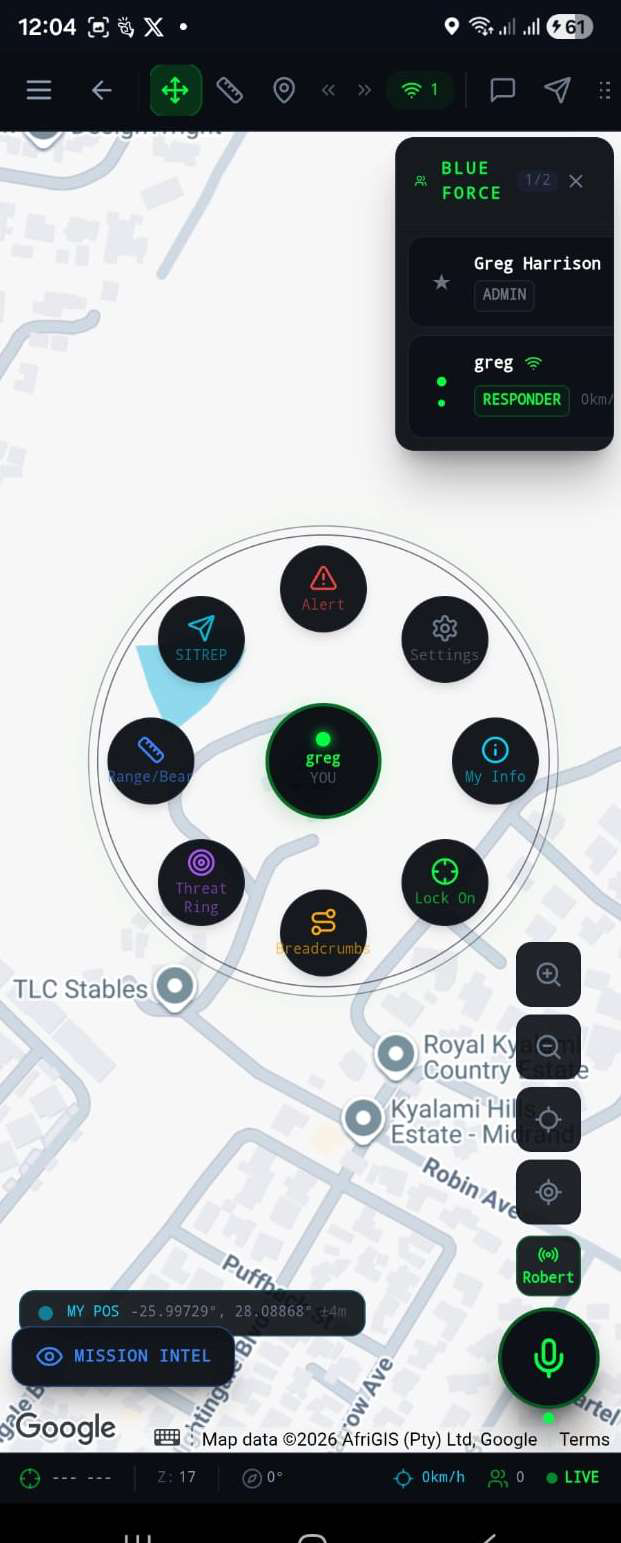
Built for coordinated operations, not solo calls. The mission-level briefing, Commander/team roles, and Blue Force tracking give a deployed unit shared situational awareness that a single-responder assignment doesn't need — SITREP and Alert push updates back to the whole team, not just the control room.